Laravel Twilio Send SMS Tutorial: A Comprehensive Guide
In this comprehensive guide, we will walk you through the process of sending SMS messages using Laravel and Twilio. We will cover everything from installing Laravel and the Twilio SDK package to creating a Twilio account, updating the .env file, and creating the necessary controllers, routes, and views. By the end of this tutorial, you will have a solid understanding of how to integrate Twilio's SMS functionality into your Laravel applications. So, let's get started!
Step 1: Installing Laravel
Before we dive into Twilio integration, let's make sure you have Laravel installed on your local machine. If you already have Laravel installed, you can skip this step. Otherwise, follow these instructions to install the latest version of Laravel:
composer create-project --prefer-dist laravel/laravel demo-app
Replace demo-app with the desired name for your project. This command will create a new Laravel project with all the necessary dependencies.
Step 2: Installing the Twilio SDK Package
To send SMS using Twilio in Laravel, we need to install the twilio/sdk package. Open your terminal, navigate to the project directory (demo-app in our case), and run the following command:
composer require twilio/sdk
This command will download and install the Twilio SDK package, enabling us to interact with the Twilio API.
Step 3: Creating a Twilio Account
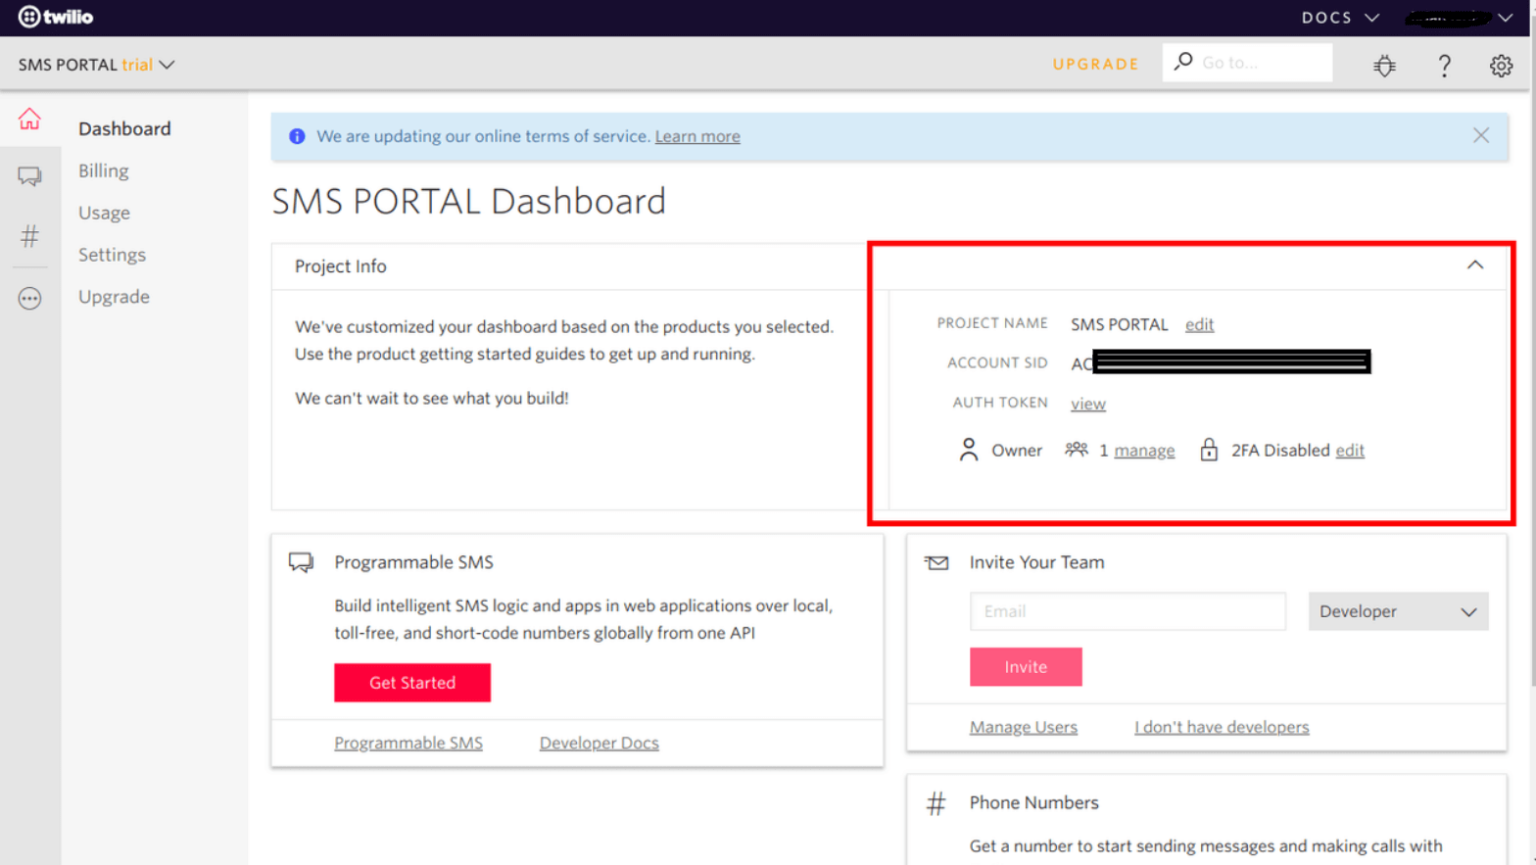
Before we can start sending SMS messages, we need to create a Twilio account. Head over to the Twilio Console and sign up for an account if you haven't already. Once signed in, you will need to grab your Account SID and Auth Token from the dashboard.
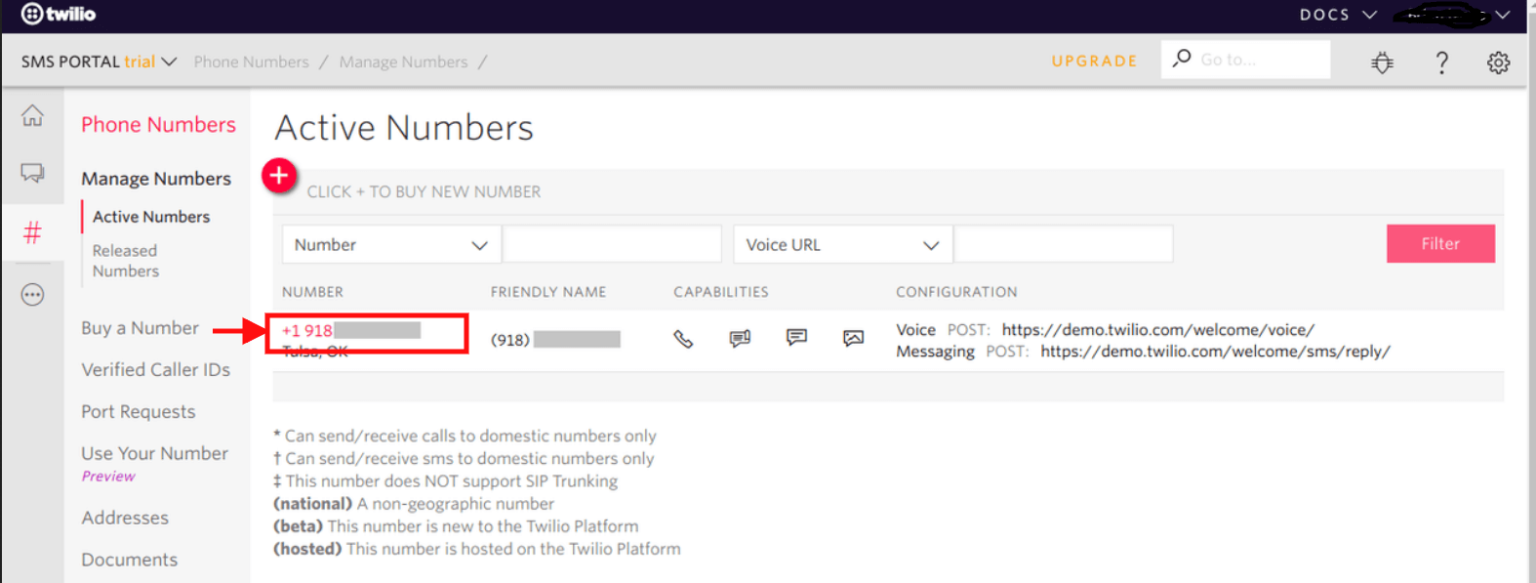
Additionally, navigate to the Phone Numbers menu section in the Twilio Console to obtain an SMS-enabled phone number that we will use to send messages.
Step 4: Updating the .env File
To securely store our Twilio credentials, we need to update the .env file in our Laravel project. Open the .env file located at the root of your project directory and add the following lines:
TWILIO_SID="INSERT YOUR TWILIO SID HERE"
TWILIO_AUTH_TOKEN="INSERT YOUR TWILIO TOKEN HERE"
TWILIO_NUMBER="+91***************"
Replace the placeholders with your Twilio Account SID, Auth Token, and SMS-enabled phone number.
Step 5: Creating the SmsController
Next, let's create a controller that will handle the SMS sending functionality. Run the following command in your terminal to generate the SmsController:
php artisan make:controller SmsController
This command will create a new file SmsController.php in the app/Http/Controllers directory. Open the file and add the following methods:
<?php
namespace App\Http\Controllers;
use Illuminate\Http\Request;
use Twilio\Rest\Client;
class SmsController extends Controller
{
    public function index()
    {
        return view('send-sms');
    }
    public function sendMessage(Request $request)
    {
        $this->validate($request, [
            'receiver' => 'required|max:15',
            'message' => 'required|min:5|max:155',
        ]);
        try {
            $accountSid = getenv("TWILIO_SID");
            $authToken = getenv("TWILIO_TOKEN");
            $twilioNumber = getenv("TWILIO_FROM");
            $client = new Client($accountSid, $authToken);
            $client->messages->create($request->receiver, [
                'from' => $twilioNumber,
                'body' => $request->message
            ]);
            return back()
            ->with('success','Sms has been successfully sent.');
        } catch (\Exception $e) {
            dd($e->getMessage());
            return back()
            ->with('error', $e->getMessage());
        }
    }
}
The index() method returns the view that will display the SMS sending form, while the sendMessage() method handles the actual sending of messages by interacting with the Twilio API.
Step 6: Creating Routes
To make our SMS sending functionality accessible, we need to define routes in the routes/web.php file. Add the following routes:
<?php
use Illuminate\Support\Facades\Route;
use App\Http\Controllers\SmsController;
Route::get('send-sms', [ SmsController::class, 'index' ])->name('get.sms.form');
Route::post('send-sms', [ SmsController::class, 'sendMessage' ])->name('send.sms');
These routes define a GET route for showing the SMS sending form and a POST route for actually sending the SMS using the sendMessage() method in the SmsController.
Step 7: Creating the Blade/HTML File
Finally, let's create the Blade/HTML file that will render the SMS sending form. Create a new file called send-sms.blade.php in the resources/views directory, and add the following code:
<!DOCTYPE html>
<html>
   <head>
      <title>Laravel Twilio Send SMS Form - YourAppName</title>
      <link rel="stylesheet" href="https://maxcdn.bootstrapcdn.com/bootstrap/4.0.0/css/bootstrap.min.css">
   </head>
   <body>
      <div class="container mt-5">
         <div class="panel panel-primary">
            <div class="panel-heading">
               <h2>Laravel Twilio Send SMS Form - YourAppName</h2>
            </div>
            <div class="panel-body">
               @if ($message = Session::get('success'))
	               <div class="alert alert-success alert-block">
	                  <button type="button" class="close" data-dismiss="alert">×</button>
	                  <strong>{{ $message }}</strong>
	               </div>
               @endif
               @if (count($errors) > 0)
               <div class="alert alert-danger">
                  <strong>Whoops!</strong> There were some problems with your input.
                  <ul>
                     @foreach ($errors->all() as $error)
                     <li>{{ $error }}</li>
                     @endforeach
                  </ul>
               </div>
               @endif
               <form action="{{ route('send.sms') }}" method="POST" enctype="multipart/form-data">
                  @csrf
                  <div class="row">
                     <div class="col-md-12">
                        <div class="col-md-6 form-group">
                           <label>Receiver Number:</label>
                           <input type="text" name="receiver" class="form-control"/>
                        </div>
                        <div class="col-md-6 form-group">
                           <label>Message:</label>
                           <textarea name="message" class="form-control"></textarea>
                        </div>
                        <div class="col-md-6 form-group">
                           <button type="submit" class="btn btn-success">Send SMS</button>
                        </div>
                     </div>
                  </div>
               </form>
            </div>
         </div>
      </div>
   </body>
</html>
This Blade/HTML file contains a form with fields for the receiver's number and the message to be sent. It also includes error and success message handling. When the form is submitted, it will trigger the sendMessage() method in the SmsController to send the SMS message.
Step 8: Testing the Application
Now that we have completed all the necessary steps, let's test our Laravel Twilio send SMS functionality. Start the Laravel development server by running the following command in your terminal:
php artisan serve
Open your browser and visit the following URL:
http://localhost:8000/send-sms
You should see the SMS sending form rendered on the page. Fill in the receiver's number and the message, then click the "Send SMS" button. If everything is set up correctly, you should see a success message indicating that the SMS has been sent.
Conclusion
Congratulations! You have successfully integrated Twilio's SMS functionality into your Laravel application. In this tutorial, we covered the installation of Laravel, the installation of the Twilio SDK package, the creation of a Twilio account, updating the .env file with Twilio credentials, creating the SmsController, defining the routes, and creating the Blade/HTML view for the SMS sending form. You are now equipped with the knowledge to send SMS messages using Twilio in your Laravel applications. Happy coding!
If you encounter any issues or have any questions, please let us know in the comments. We appreciate your feedback and are here to assist you.
Leave A Comment